Home |
|---|
|
Bringing the office to the field, IMAP Audits Inc. is excited to provide the next step in data collection. In the past, Auditors had to use the pen to paper method, carrying a clipboard full of drawings and note pads in order to gather the information required from the field. They would then have to bring their notes into an office, and input the information into the database via computer. In this new age of electronics and technology, all of this can now be completed live, as the auditors are in the field with any Wi-Fi enabled mobile device (smart phone or tablet). |
Install |
|---|
|
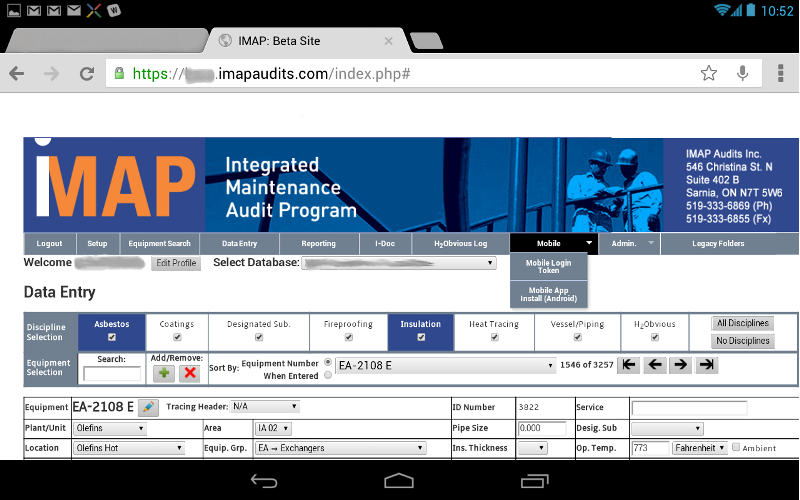
Installing the IMAP Audits Inc. EZ Audit application is as easy as downloading the latest Angry Birds game. To get started, open the internet on the mobile device. Log onto the IMAP Audits Inc. website using your regular credentials. Once logged on, tap on the Mobile tab. From the drop down list, select the Mobile App Install (Android) option. This will re-direct you to a new page with a step by step guide on installing the IMAP Audits Mobile App. Changes in the security settings of the mobile device may be required. |
Log In |
|
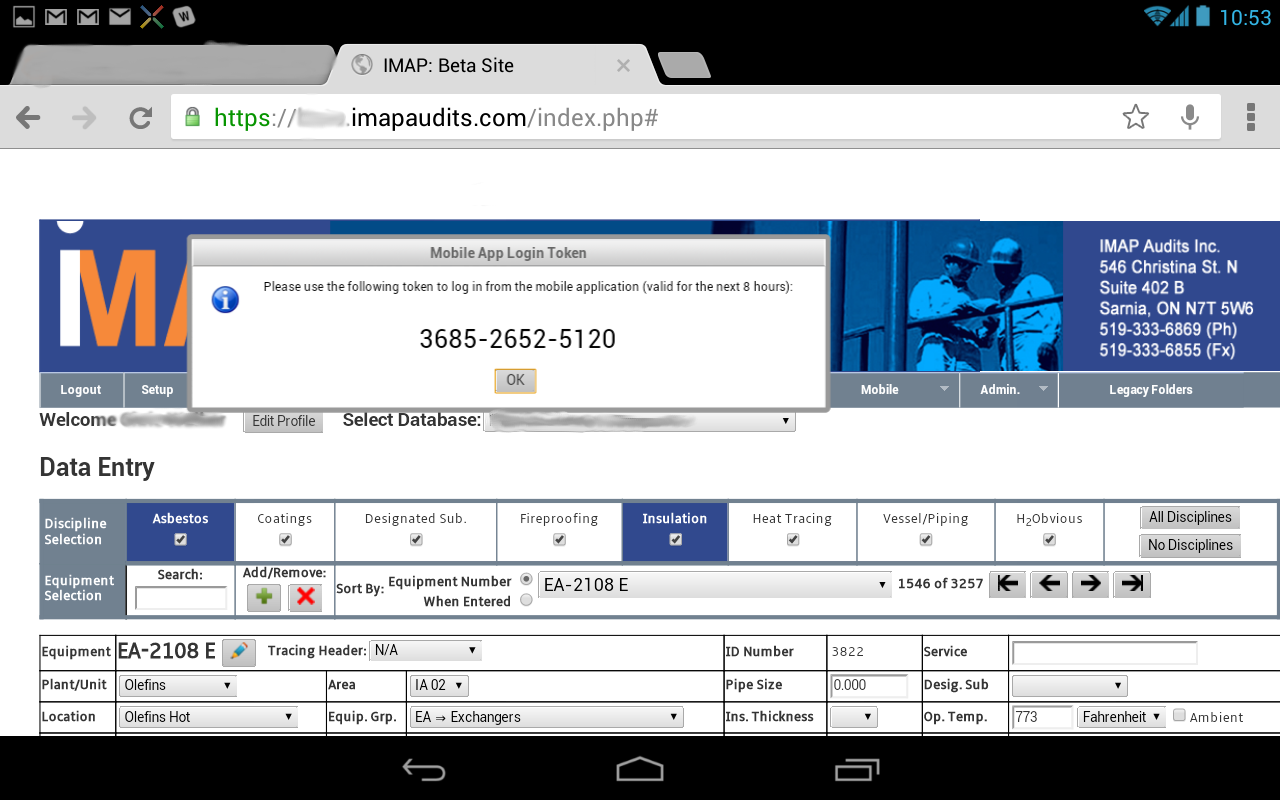
Once the IMAP Audits Inc. EZ Audit app software has been installed on your mobile device you can log in and
start synchronizing data. Much like the installation process, you must be logged onto the main web page in
order to gain access to the mobile account. Note: This can be made easy if you are logged in on a computer,
while trying to log in on the mobile device. Click on the Mobile tab, select the Mobile Login Token.
|
Down Sync |
|
Tap Sync once again. This brings you to the syncing page where you can put in as much or as little information that you want, in order to search and filter for equipment. At this time, the only required information is the ite selection. All other fields are optional; however it is suggested to enter as much information as possible, in order to make the search and sync as fast as possible. Once the information has been selected, tap the Find Equipment button. With a populated list present, you can filter the list even further using the Filter text box. Simply enter an equipment name, or even an equipment group and the selection list will only show items that are associated with said equipment. Once the data has been populated and filtered, you can scroll through the list and tap on the items you wish to "sync". As you tap on the items, they will automatically move to the top of the list so you can be sure to "sync" everything you need. When you are finished searching for equipment, tap the "sync" button in the top right corner. When the "sync" is completed, you can then work straight from your mobile device, in the office or the field, creating new audits, or editing old ones. All synced information will be saved on the mobile device until which time you decide to "Up Sync", or re-"Down Sync". You will be prompted with pop-up windows verifying the action you are about to complete. |
Up Sync
Now that you have completed audits in the field it is time to "Up Sync" or upload your data. In order to do this, you must have an internet connection and be logged into the mobile app. When you are finished editing and completing new audits, go to the Main Menu. If you are still in an audit page, tap the back button in the top left corner, then tap the Home button in the top left corner. Once you are at the Main Menu, tap the Sync button, a message box will pop up asking if you would like to upload your changes. If you discard your changes, you will lose all of your work. If you tap the cancel button, you may continue to work as usual, and upload at another time. When the up sync is finished, you can log onto the main website database on your computer and find, edit, or finalize all the work that was completed on the mobile device.
Data Entry
Data Entry can now be handled 'live' as the auditors are in the field. This does not require an internet connection,
as the data will be saved on the mobile device until the next time you sync. Two options are available at the Data Entry
level; Select Equipment and New Equipment.
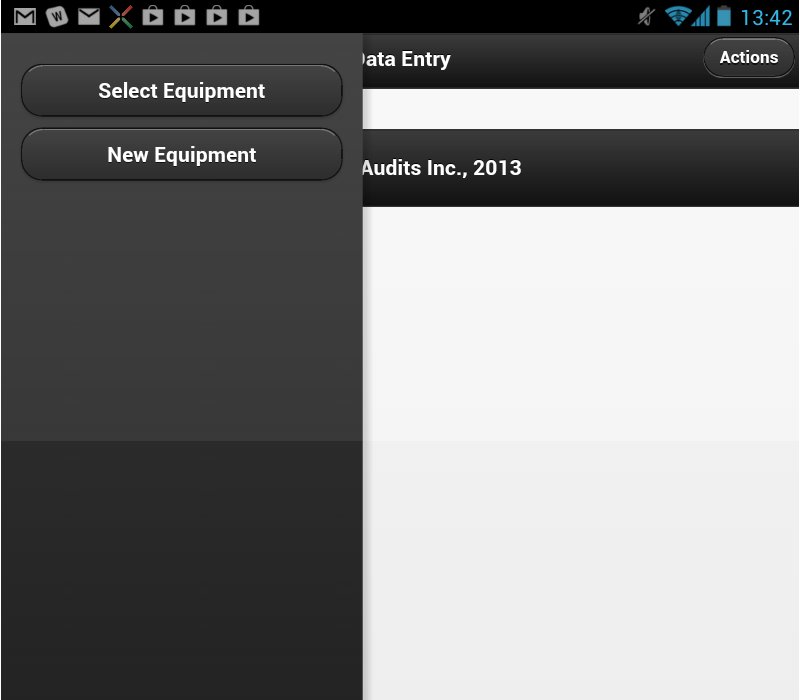
Using the Select Equipment option populates the list of equipment that was synced to the mobile device in the beginning
stages. Selecting a piece of equipment allows you to edit or add information to the details and audit pages. Using the
New Equipment option allows you to complete a new audit on a new piece of equipment.
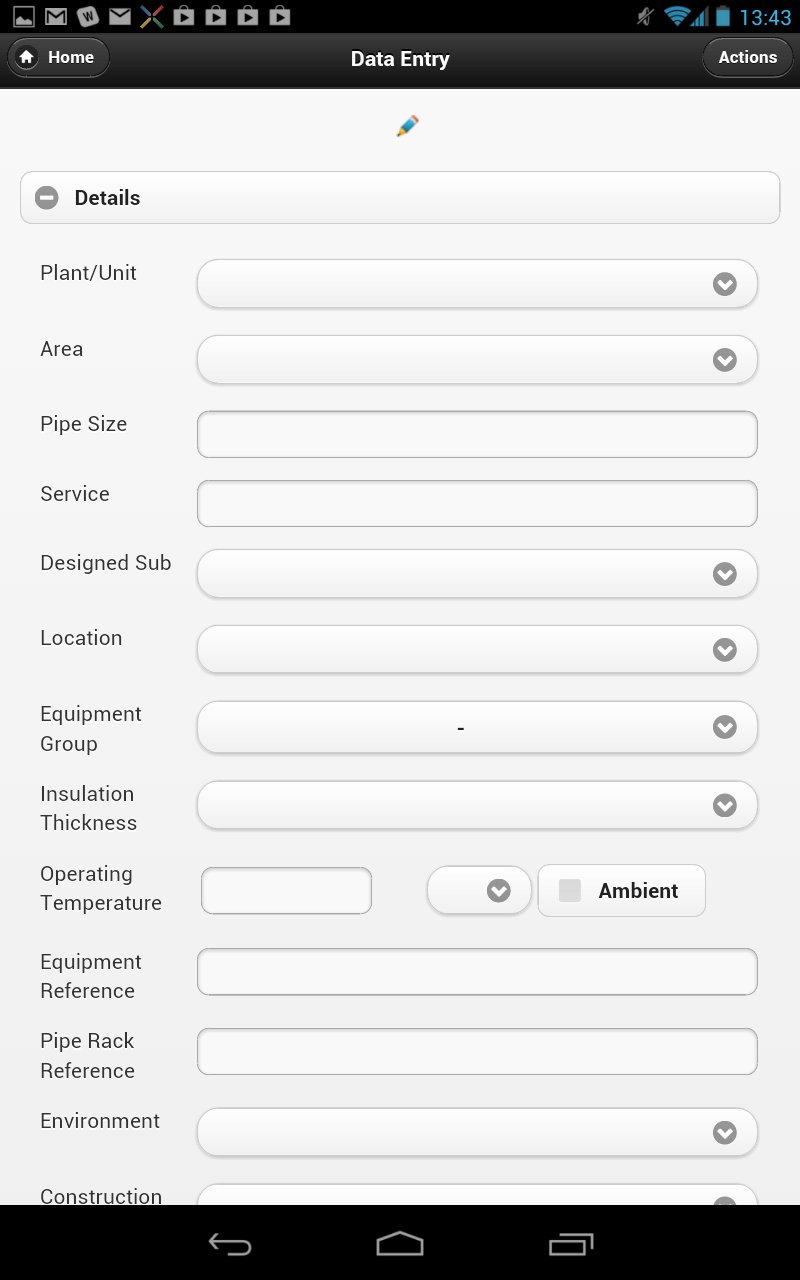 Again, all changes will be saved on the mobile device until you sync.
Items Table
The Items table contains all the information regarding the contents of the equipment. This table populates the key items that workers may need to know about before commencing work. The majority of information is entered through selection lists and predetermined text boxes, in order to keep user typing to a minimum.
Images
Associating images to an audit page was historically, a cumbersome task; bringing the camera to the field, taking a
photo, going back to the office, placing the camera's memory card in your computer, re-sizing the image, saving the new
image, moving the image to the server, and inserting the image into the audit form. All of this can now be skipped as
the images can now be taken during the audit process. Once you have entered the initial equipment information and audit
details, all you have to do is press the Take Photo button at the bottom of the audit details page.
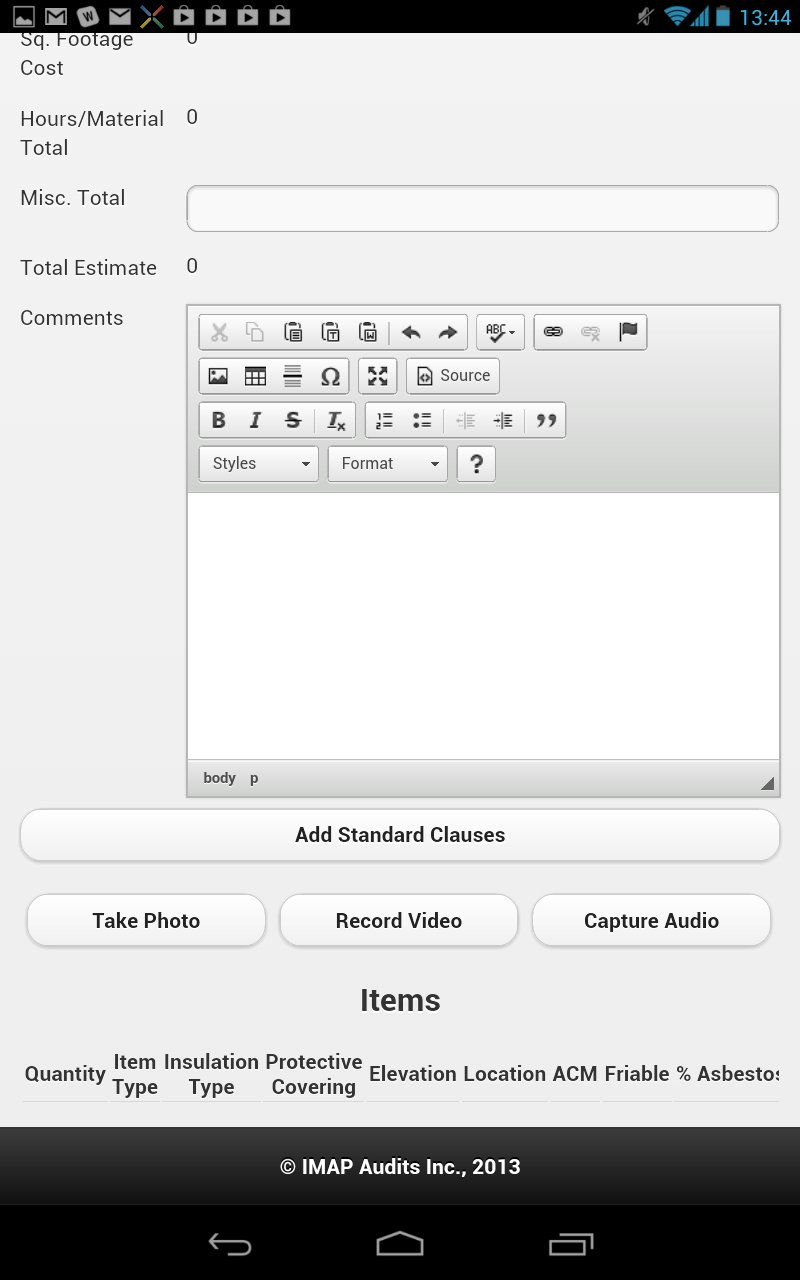
Note: This will open the mobile device camera.
Once the image is taken, you have the option to discard or save. If you discard the photo, you will go back to the camera
where you can take another photo. If you tap the save button, the image will automatically upload to the audit details
page of the equipment. You can then add comments to the description of the image.
Video/ Audio
Adding video and audio clips is the exact same as adding an images. Once your audit details have been initiated, all you need to do is tap the video button at the bottom of the audit details page. This will open the video recorder on the mobile device. Once you have finished recording, the video or audio clip will be automatically uploaded to the audit details page. There is also an area to add a description if needed.
File Upload
This section is still under development.
